Boot Raspberry Pi from USB stick
This has been tested with a Raspberry Pi Model B revision 2.0 on Raspbian Stretch Lite Release date: 2017-08-16, Kernel version: 4.9

There are good reasons you want to run raspberry pi on an USB stick instead of SD card:
- Faster
- Free the SD card slot
Everything needs to be done with terminal and here we use Linux. Mac command line would be slight different.
- Download, unzip and install image to USB stick and SD card(yes, on both, unless you know how to format the SD card to FAT and then copy /boot partition files from USB to SD card )
Linux, replace sdX with your drive number, such as sda, sdb or mmcblk0, lsblk will find out
sudo dd bs=1M if=2017-08-16-raspbian-stretch.img of=/dev/sdX conv=fsync
Mac, replace diskn with your drive number, like disk2 or disk3, diskutil list will find out
sudo dd bs=1m if=2017-08-16-raspbian-stretch.img of=/dev/diskn conv=sync - Boot your machine with SD card(if you dd write image to SD card) and edit /boot/cmdline.txt, replace the similar line with this:
dwc_otg.lpm_enable=0 console=serial0,115200 console=tty1 root=/dev/sda2 rootfstype=ext4 rootwait text
replace sda2 to your drive number or use UUID root=PARTUUID=ee397c53-02
vi /boot/cmdline.txt - Reboot
You will need the SD card plugged in to boot the system so far and you can unplug it after the system is up.

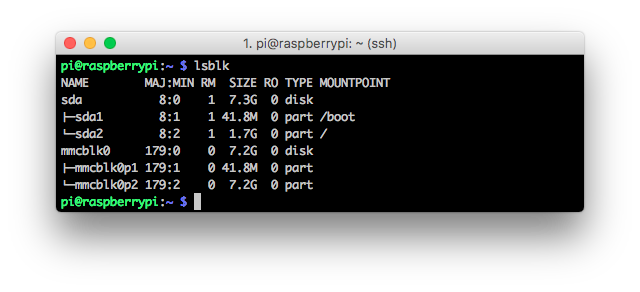
From the screenshot above, you might notice the partition size is not correct as we will need to expand the partition if we use dd to write image to SD card or USB.
To expand the partition, simply login to raspi and use fdisk to remove old partition and add a new partition, but before removing old partition, you need to write down the partition start number and use that number for new partition start number and use default number as end. After that, run resize2fs to get the file system updated.
sudo resize2fs /dev/sda2
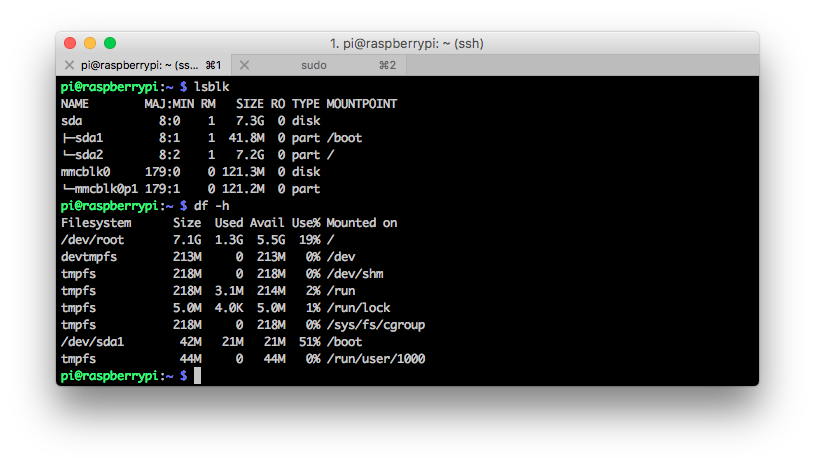
So the new partition layout would be like this:


